How to Install Clawdbot/Moltbot: Complete Step-by-Step Guide (2026)
Complete guide to installing Clawdbot (now Moltbot) - personal AI assistant on Telegram, WhatsApp, Discord, Signal. Setup in 30 minutes.
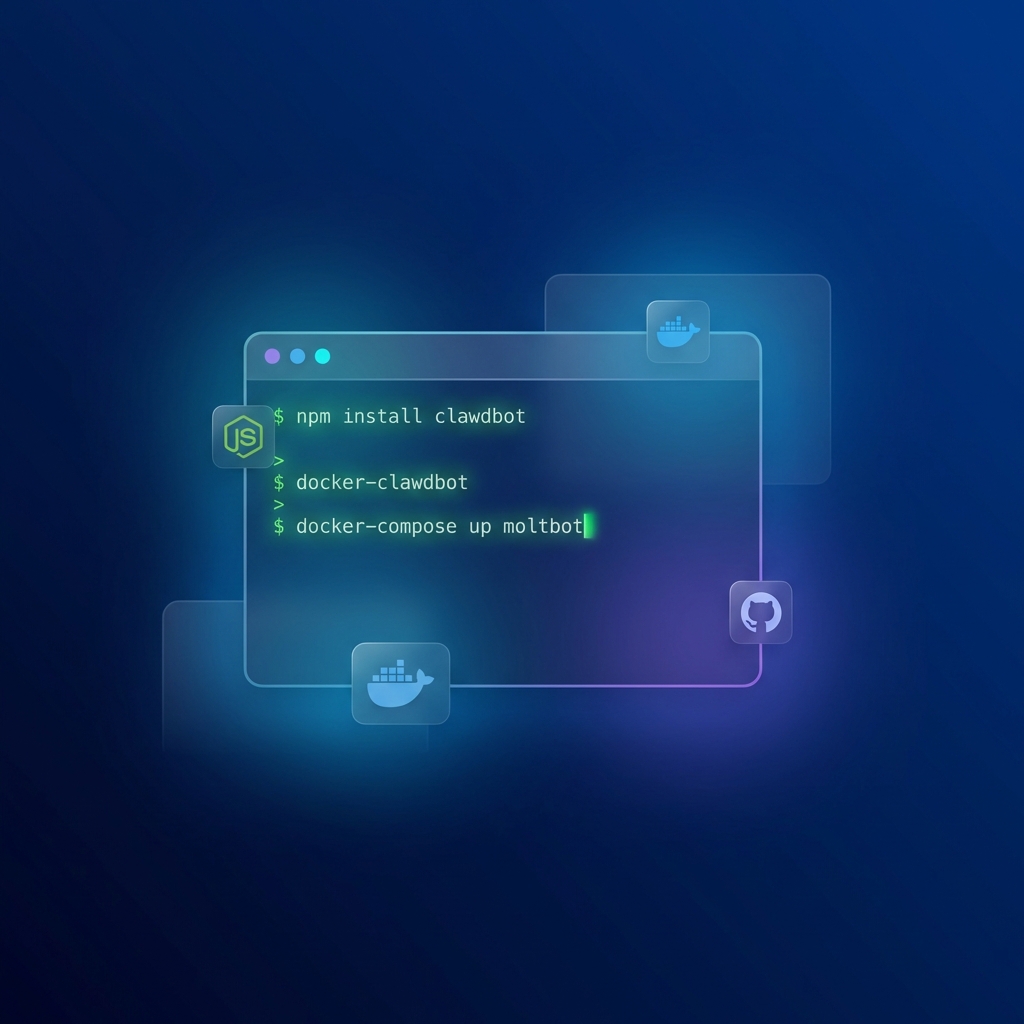
Clawdbot (now rebranded as Moltbot) is the open-source personal AI assistant that messages you first. In this guide, I'll walk you through the entire installation process from scratch to first proactive message.
Total setup time: 30-60 minutes
Difficulty: Intermediate (requires basic CLI knowledge)
Prerequisites: Node.js 18+, Telegram account, AI API key
Table of Contents
1. Prerequisites
2. Step-by-Step Installation
3. Configuration
4. Connecting Channels
5. Testing Your Setup
6. Troubleshooting
7. Advanced Setup
Prerequisites
What You'll Need
| Requirement | Minimum | Recommended |
|---|---|---|
| Operating System | Windows 10+, macOS 12+, Ubuntu 20.04+ | Any modern OS |
| Node.js | 18.x | 20.x or later |
| RAM | 2GB | 4GB or more |
| Disk Space | 500MB | 1GB+ |
| Internet | Stable connection | Fast and stable |
Software & Accounts
Required:
Required Accounts:
- •Telegram account (for creating bot via BotFather)
- •AI API key (choose one):
- •Console
- •Platform
- •Google AI Studio
- •Zhipu AI
Optional (for additional channels):
- •WhatsApp Business API
- •Discord Developer account
- •Twilio account (for SMS)
- •Gmail/Outlook account (for email)
Step-by-Step Installation
Step 1: Choose Your Installation Method
Option A: Local Installation (Recommended for Personal Use)
- •✅ Pros: Faster, no server costs, full control
- •❌ Cons: Computer must be on, single user
Option B: VPS/Cloud Installation (Recommended for Multi-User)
- •✅ Pros: Always on, multiple users, better uptime
- •❌ Cons: Monthly cost (~$5-20), more complex
Option C: Docker (Recommended for Developers)
- •✅ Pros: Reproducible, easy updates, portable
- •❌ Cons: Requires Docker knowledge
This guide covers all three methods.
Step 2: Clone the Repository
## Clone Moltbot (formerly Clawdbot)
git clone https://github.com/clawdbot/clawdbot.git
cd clawdbot

## Verify you're in the right directory
pwd
# Should show: /path/to/clawdbot
What we downloaded:
- •Moltbot core code
- •Default skills (email, calendar, etc.)
- •Configuration templates
- •Documentation
Step 3: Install Dependencies
Option A: Using npm (Node.js)
## Install all dependencies
npm install

## This installs:
## - Core libraries
## - API clients
## - Messaging platform SDKs
## - CLI tools
## - Development dependencies
Option B: Using Docker (Recommended)
## Build Docker image
docker build -t moltbot .

## Run container
docker run -d \
  --name moltbot \
  -v $(pwd)/config:/app/config \
  -v $(pwd)/skills:/app/skills \
  moltbot
Option C: Using Docker Compose (Easiest for VPS)
## Create docker-compose.yml (provided in repo)
## Start all services
docker-compose up -d

## This starts:
## - Moltbot container
## - Database (if needed)
## - Redis (for caching)
## - Nginx (reverse proxy)
Step 4: Configure Moltbot
Create Configuration File
## Copy example config
cp .env.example .env

## Edit the configuration
nano .env  # or vim .env, code .env
Required Configuration
## Core Settings
NODE_ENV=production
LOG_LEVEL=info

## Telegram Bot (Required)
TELEGRAM_BOT_TOKEN=your_telegram_bot_token_here

## AI Model Configuration (Choose One)
## Option A: Claude (Recommended)
AI_PROVIDER=anthropic
ANTHROPIC_API_KEY=sk-ant-xxxxx
AI_MODEL=claude-3-5-sonnet-20241022

## Option B: OpenAI
## AI_PROVIDER=openai
## OPENAI_API_KEY=sk-proj-xxxxx
## AI_MODEL=gpt-4-turbo-preview

## Option C: Google Gemini
## AI_PROVIDER=google
## GOOGLE_API_KEY=xxxxx
## AI_MODEL=gemini-pro

## Server Settings
PORT=3000
HOST=localhost

## Paths
DATA_PATH=./data
SKILLS_PATH=./skills
Get Telegram Bot Token
1. Open Telegram and search for @BotFather
2. Send /newbot
3. BotFather asks for bot name:
Enter bot name: MyMoltbot
4. BotFather asks for username:
Enter bot username: my_moltbot_bot
5. Copy the bot token (looks like: 123456789:ABCdefGHIjklMNOpqrsTUVwxyz)
6. Paste it into your .env file:
TELEGRAM_BOT_TOKEN=123456789:ABCdefGHIjklMNOpqrsTUVwxyz
Get AI API Key
For Claude:
1. Go to Console
2. Sign in or create account
3. Navigate to API Keys
4. Click Create Key
5. Copy the key (starts with sk-ant-)
6. Paste into .env:
ANTHROPIC_API_KEY=sk-ant-xxxxx
For OpenAI:
1. Go to Platform
2. Sign in or create account
3. Navigate to API Keys
4. Click Create new secret key
5. Copy the key
6. Paste into .env:
OPENAI_API_KEY=sk-proj-xxxxx
Configuration
Basic Configuration
## Start Moltbot
npm start

## You should see:
## [INFO] Moltbot starting...
## [INFO] Loading configuration from .env
## [INFO] Initializing AI provider: anthropic
## [INFO] Connecting to Telegram...
## [INFO] Telegram bot connected: @your_bot_username
## [INFO] Moltbot is running!
Test Basic Functionality
1. Open Telegram
2. Search for your bot (@your_bot_username)
3. Send /start
4. Bot should respond:
   Welcome to Moltbot! I'm your personal AI assistant.

   Here's what I can do:
   /help - Show all commands
   /config - Configure settings
   /email - Email management
   /calendar - Calendar management
Connecting Channels
Connect Telegram (Already Done)
Telegram is the default channel. Your bot is already connected via the bot token you configured.
Connect WhatsApp (Optional)
Prerequisites:
- •WhatsApp Business account
- •Meta Developer account
- •Business API access
Setup:
## Add to .env
WHATSAPP_ENABLED=true
WHATSAPP_PHONE_NUMBER=+1234567890
WHATSAPP_API_KEY=your_whatsapp_api_key
WHATSAPP_WEBHOOK_URL=https://your-domain.com/webhook/whatsapp

## Restart Moltbot
npm start
Test:
1. Save your business number in WhatsApp
2. Send message to your number
3. Moltbot should respond
Connect Discord (Optional)
Prerequisites:
- •Discord Developer account
- •Bot token from Discord Developer Portal
Setup:
## Add to .env
DISCORD_ENABLED=true
DISCORD_BOT_TOKEN=your_discord_bot_token
DISCORD_GUILD_ID=your_server_id

## Restart Moltbot
npm start
Test:
1. Invite your bot to a Discord server
2. Send /help
3. Bot should respond with available commands
Connect Email (Gmail/Outlook)
For Gmail:
## Add to .env
EMAIL_ENABLED=true
EMAIL_PROVIDER=gmail
EMAIL_CLIENT_ID=your_google_client_id
EMAIL_CLIENT_SECRET=your_google_client_secret
EMAIL_REFRESH_TOKEN=your_refresh_token

## Note: Requires OAuth setup with Google Cloud Console
For Outlook:
## Add to .env
EMAIL_ENABLED=true
EMAIL_PROVIDER=outlook
EMAIL_CLIENT_ID=your_microsoft_client_id
EMAIL_CLIENT_SECRET=your_microsoft_client_secret
EMAIL_TENANT_ID=your_tenant_id

## Note: Requires app registration in Azure Portal
Connect Google Calendar
## Add to .env
CALENDAR_ENABLED=true
CALENDAR_PROVIDER=google
CALENDAR_CLIENT_ID=your_google_client_id
CALENDAR_CLIENT_SECRET=your_google_client_secret
CALENDAR_REFRESH_TOKEN=your_refresh_token

## Restart Moltbot
npm start
Testing Your Setup
Test 1: Proactive Messaging
Configuration:
## In .env or via /config command
PROACTIVE_ENABLED=true
PROACTIVE_TIME=07:00
PROACTIVE_TIMEZONE=America/New_York
Test:
1. Wait until 7:00 AM (or your configured time)
2. Telegram should receive morning briefing:
   🌅 Good morning! Here's your briefing:

   📅 Calendar (2 events today)
   - 9:00 AM - Team standup
   - 2:00 PM - Client call

   📧 Email (3 unread, 1 priority)
   - Urgent: Client project update needed
   - [2 more emails]

   🌤 Weather: 65°F, Sunny

   📰 News (Technology)
   - AI regulation updates announced...
Test 2: Email Drafting
In Telegram, send:
/email draft
Subject: Project Update
To: client@example.com
Context: We finished the API integration, but need to test before deploying.
Moltbot should respond with:
✅ Email drafted! Here's the draft:

   Subject: Project Update
   To: client@example.com

   Hi [Client Name],

   I wanted to give you a quick update on our project progress.

   We've successfully completed the API integration and are now
   in the testing phase. We plan to run through our test
   suite this afternoon.

   Once everything is verified, we'll proceed with the deployment.

   Best regards,
   [Your Name]

   /send to send this email
   /edit to modify
   /cancel to discard
Test 3: Calendar Management
In Telegram, send:
/calendar add
Title: Weekly Team Sync
Date: 2026-02-05
Time: 10:00 AM
Duration: 1 hour
Location: Zoom (link provided)
Attendees: team@company.com
Description: Discuss Q1 roadmap and priorities
Moltbot should respond with:
✅ Event added to Google Calendar!

   Title: Weekly Team Sync
   When: Feb 5, 2026 at 10:00 AM
   Where: Zoom (link provided)

   Meeting link: [zoom link]
   Calendar link: [Google Calendar link]

   📧 Sending invitations to: team@company.com
Test 4: Terminal Commands
Enable terminal access in config:
## In .env
TERMINAL_ENABLED=true
TERMINAL_ALLOWED_COMMANDS=ls,git,npm,node
In Telegram, send:
/terminal ls -la
Moltbot should respond with:
📁 Directory listing:

   drwxr-xr-x  user  Documents
   drwxr-xr-x  user  Downloads
   -rw-r--r--  user  README.md
   -rw-r--r--  user  package.json
   ...

   Note: Commands executed: 1
Troubleshooting
Issue 1: "Bot token is invalid"
Error:
[ERROR] Telegram API returned 401 Unauthorized
Solution:
1. Double-check your bot token in .env
2. Make sure there's no extra spaces or quotes
3. Regenerate token from BotFather if needed
4. Restart Moltbot:
npm stop && npm start
Issue 2: "AI API key error"
Error:
[ERROR] Anthropic API returned 401 Unauthorized
Solution:
1. Verify API key is correct (starts with sk-ant- for Claude)
2. Check your API key permissions in provider console
3. Ensure you have credits/subscription
4. Try a simple test:
   curl https://api.anthropic.com/v1/messages \
     -H "x-api-key: YOUR_API_KEY" \
     -H "content-type: application/json" \
     -d '{"model":"claude-3-5-sonnet-20241022","max_tokens":1024,"messages":[{"role":"user","content":"Hello"}]}'
Issue 3: "Port 3000 already in use"
Error:
[ERROR] Port 3000 is already in use
Solution:
## Option A: Change port in .env
PORT=3001

## Option B: Kill process using port 3000
## On Linux/macOS:
lsof -ti:3000 | xargs kill -9

## On Windows:
netstat -ano | findstr :3000
taskkill /PID  /F
Issue 4: "Bot not responding"
Check:
1. Is Moltbot running?
ps aux | grep moltbot
2. Check logs:
tail -f logs/moltbot.log
3. Test Telegram connection:
curl https://api.telegram.org/bot/getMe
Issue 5: "Email not sending"
Check:
1. Verify OAuth tokens are valid
2. Check email provider status (Gmail/Outlook sometimes has outages)
3. Ensure EMAIL_ENABLED=true in .env
4. Check logs for specific error messages
Advanced Setup
Run as Systemd Service (Linux/VPS)
Create service file:
sudo nano /etc/systemd/system/moltbot.service
Add:
[Unit]
Description=Moltbot Personal AI Assistant
After=network.target

[Service]
Type=simple
User=moltbot
WorkingDirectory=/home/moltbot/clawdbot
ExecStart=/usr/bin/npm start
Restart=always
RestartSec=10
Environment=NODE_ENV=production

[Install]
WantedBy=multi-user.target
Enable and start:
sudo systemctl daemon-reload
sudo systemctl enable moltbot
sudo systemctl start moltbot
sudo systemctl status moltbot
Run with PM2 (Recommended for VPS)
## Install PM2
npm install -g pm2

## Start Moltbot with PM2
pm2 start npm --name "moltbot" -- start

## Save PM2 configuration
pm2 save

## Setup PM2 to start on boot
pm2 startup
Monitor:
pm2 list
pm2 logs moltbot
pm2 restart moltbot
Configure Reverse Proxy with Nginx (VPS Only)
Why: To access web dashboard, receive webhooks securely
Nginx config:
server {
    listen 80;
    server_name your-domain.com;

    location / {
        proxy_pass http://localhost:3000;
        proxy_http_version 1.1;
        proxy_set_header Upgrade $http_upgrade;
        proxy_set_header Connection 'upgrade';
        proxy_set_header Host $host;
        proxy_cache_bypass $http_upgrade;
    }

    location /webhook/ {
        proxy_pass http://localhost:3000/webhook/;
        proxy_http_version 1.1;
        proxy_set_header Host $host;
        proxy_set_header X-Real-IP $remote_addr;
    }
}
SSL with Let's Encrypt:
sudo apt install certbot python3-certbot-nginx
sudo certbot --nginx -d your-domain.com
Customizing Moltbot
Add Custom Skills
Create new skill:
## In skills/ directory
mkdir -p skills/custom
nano skills/custom/my-skill.md
Skill template:
---
name: weather-alert
description: Send weather alerts at scheduled times
---

## Weather Alert Skill

## Configuration
{
"enabled": true,
"schedule": "08:00,18:00",
"location": "San Francisco, CA",
"notificationChannel": "telegram"
}
## Implementation
- Fetch weather from API
- Check conditions (rain, wind, etc.)
- Send alert if threshold exceeded

## Commands
/weather-alert - Check current weather
/weather-alert on - Enable alerts
/weather-alert off - Disable alerts
Restart Moltbot to load skill:
npm restart
Customize Morning Briefing
Configure in .env:
## Briefing content
MORNING_BRIEFING_CALENDAR=true
MORNING_BRIEFING_EMAIL=true
MORNING_BRIEFING_NEWS=true
MORNING_BRIEFING_WEATHER=true

## Briefing timing
MORNING_BRIEFING_TIME=07:00
MORNING_BRIEFING_TIMEZONE=America/New_York

## Briefing tone
BRIEFING_TONE=professional  # casual, professional, minimal
Performance Optimization
Reduce API Costs
In .env:
## Use cheaper models for routine tasks
AI_MODEL_ROUTING=auto
ROUTING_RULES=weather:gemini-flash,calendar:gpt-4-mini,email:claude-haiku

## Enable response caching
CACHE_ENABLED=true
CACHE_TTL=3600
Result: Up to 70% cost reduction for routine tasks
Reduce Memory Usage
In .env:
## Disable unused features
WHATSAPP_ENABLED=false
DISCORD_ENABLED=false
TERMINAL_ENABLED=false

## Reduce history size
MAX_HISTORY_DAYS=30
MAX_CONTEXT_TOKENS=4000
Result: 50-70% memory reduction for personal use
Security Best Practices
Protect Your API Keys
Never commit .env to Git:
## Add to .gitignore
echo ".env" >> .gitignore

## Remove if accidentally committed
git rm --cached .env
git commit -m "Remove .env from git"
Use Environment Variables
Don't hardcode keys:
## ❌ Bad
const apiKey = "sk-ant-12345"

## ✅ Good
const apiKey = process.env.ANTHROPIC_API_KEY
Enable Rate Limiting
In .env:
RATE_LIMIT_ENABLED=true
RATE_LIMIT_MAX_REQUESTS=100
RATE_LIMIT_WINDOW=3600  # 1 hour
Restrict Terminal Commands
In .env:
TERMINAL_ENABLED=true
TERMINAL_WHITELIST=ls,cd,git,npm,start,stop
TERMINAL_BLACKLIST=rm,dd,format,shutdown
Backup & Recovery
Backup Configuration
## Backup .env and config
cp .env backups/.env.backup-$(date +%Y%m%d)
cp -r config backups/config-$(date +%Y%m%d)

## Backup with Git
git add .
git commit -m "Backup $(date)"
git push
Backup Data & Skills
## Automated backup script
#!/bin/bash
DATE=$(date +%Y%m%d)
BACKUP_DIR=backups/$DATE

mkdir -p $BACKUP_DIR
cp -r data $BACKUP_DIR/
cp -r skills $BACKUP_DIR/
tar -czf backups/moltbot-$DATE.tar.gz $BACKUP_DIR

## Delete backups older than 30 days
find backups/ -type f -mtime +30 -delete
Next Steps
After Installation
1. Test all channels (Telegram, email, calendar)
2. Configure proactive messaging (set briefing time, timezone)
3. Add custom skills based on your workflow
4. Monitor logs for first week
5. Adjust configuration based on usage patterns
Expand Functionality
- •Add more messaging channels (WhatsApp, Discord)
- •Integrate with more services (Notion, Slack, GitHub)
- •Create custom workflows (flight check-in, news alerts)
- •Set up automated tasks (daily reports, backups)
FAQs
Q: Can I run Moltbot on a Raspberry Pi?
A: Yes! Moltbot runs on Linux, and Raspberry Pi OS is Debian-based. Expect slower performance due to limited RAM. Use lightweight AI models (Claude Haiku, GPT-4-mini).
Q: Can I use Moltbot without Telegram?
A: You need at least one messaging channel. Telegram is easiest, but WhatsApp, Discord, and Signal are also supported. You can disable Telegram and use another channel exclusively.
Q: How much does Moltbot cost to run?
A: The software is free. Costs are:
- •API usage: $5-20/month (varies by model)
- •Server/VPS: $5-20/month (optional, for 24/7)
- •Total: $10-40/month for full setup
Q: Can I use Moltbot with multiple Telegram accounts?
A: Each bot requires unique token. You can run multiple Moltbot instances (with different config files) for different accounts, or create channels within one bot instance.
Q: Is Moltbot suitable for enterprise use?
A: For personal/small team use, yes. For enterprise, consider:
- •Self-hosted deployment on company infrastructure
- •OAuth integration with company accounts
- •Custom skills for company workflows
- •Compliance and security review
Q: How do I update Moltbot?
A:
cd clawdbot
git pull origin main
npm install
npm restart  # or systemctl restart moltbot
Conclusion
Moltbot (formerly Clawdbot) is the most capable personal AI assistant available today. With proactive messaging, multi-channel support, and complete customization, it transforms how you interact with AI.
Setup time: 30-60 minutes
Ongoing cost: $10-40/month (depending on usage)
Difficulty: Intermediate (technical)
If you value privacy, automation, and proactive AI, Moltbot is worth the setup time.
Related Guides:
Need Help?
Share this article
About NeuralStackly Team
Expert researcher and writer at NeuralStackly, dedicated to finding the best AI tools to boost productivity and business growth.
View all postsRelated Articles
Continue reading with these related posts

Clawdbot vs Moltbot: The Viral AI Assistant Comparison (2026)
Clawdbot (now Moltbot) is taking over the internet as a personal AI assistant that actually messages you first. We tested it for 2+ weeks. Here's what we found.
Moltbot: The Viral AI Assistant That Messages YOU First
Moltbot: The Viral AI Assistant That Messages YOU First
Moltbot (formerly Clawdbot) is taking over the internet as a personal AI assistant that actually messages you first. We tested it for 2+ weeks. Here's what we found.
Moltbot: The X Trends 2026 Viral AI Assistant That Messages You First
Moltbot: The X Trends 2026 Viral AI Assistant That Messages You First
Moltbot (formerly Clawdbot) is the AI assistant everyone's talking about on X. Proactive messaging, self-hosted privacy, and terminal access make it the perfect fit for X trends...

Best AI Agents 2025: Complete Platform Comparison
Compare the best AI agents of 2025: AutoGPT, CrewAI, Microsoft Copilot Studio, AgentGPT, and LangChain. Features, pricing, pros/cons, and which platform fits your needs.
Best Local AI Tools 2026: Run AI Completely Offline Without Cloud
Best Local AI Tools 2026: Run AI Completely Offline Without Cloud
Complete guide to running AI locally in 2026. Compare Ollama, LM Studio, GPT4All, Locommand, and 12 more tools for private, offline AI.